Generate Captions from a Video with Microsoft Stream 📽️📃

If you have been working with videos and recordings recently, you may have been asked to generate captions, or procure a “vtt” file with captions for a video.  There are services, like rev.com, that you can hire to create these caption files… but before you do that, you may want to check out this option that you already have in your Office 365 suite in an application called Microsoft Stream.

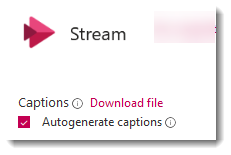
Stream captions

Note: For WSU Faculty and staff: you can also utilize Panopto to export captions. Contact the Office of Instructional Resources for more information.

Before we jump in, thank you to Rebeca for her question about this and for inspiring this Byte!

Warning: AI Ahead

This application uses Microsoft’s AI (Artificial Intelligence) to generate captions; it is the same software you use when you use captions in PowerPoint or Teams.

If you have ever used this feature in those applications, you may have noticed that the translations are not always perfect, and sometimes, unfortunately, Microsoft has trouble generating captions at all… long story short, be sure to double check the file that is generated from this process for accuracy.

Microsoft Stream

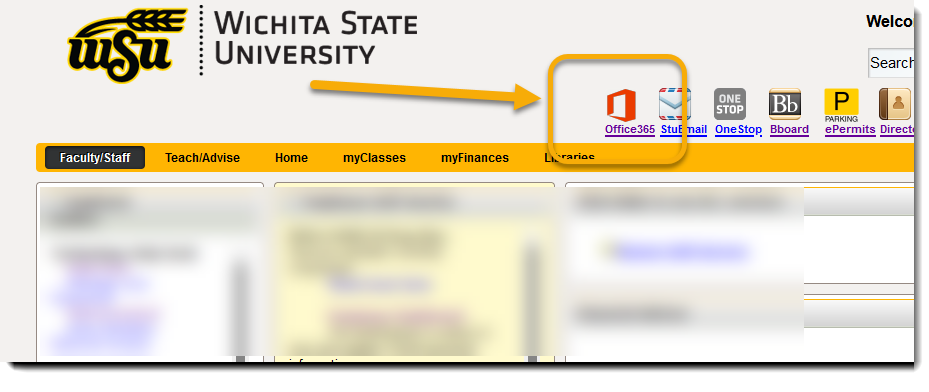
1. To access Microsoft Stream, first log into your Office 365 account. There is a shortcut in the upper right of your myWSU screen:

Office 365 link in myWSU

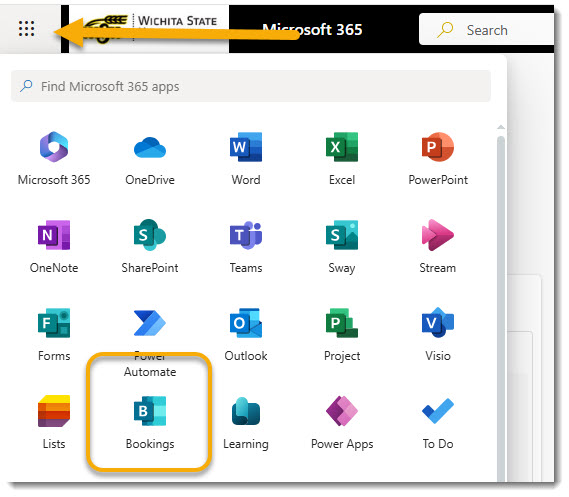
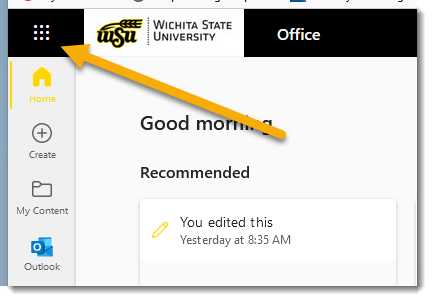
2. Once you have logged in, click on on the waffle at the upper left…

MS Office online, waffle

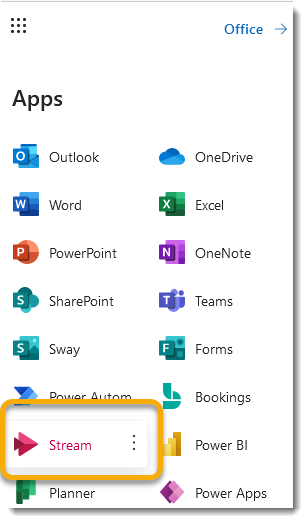
3. And find Stream in the app list. If you don’t see Stream here, click on More Apps at the bottom of the dropdown.

MS Office Applications in waffle

Upload a Video

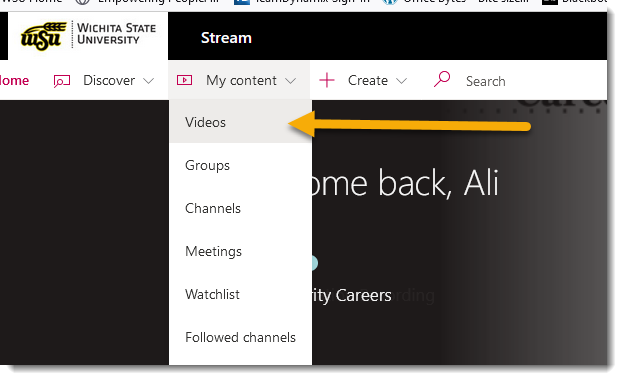
1. In Stream, in the ribbon at the top, select the My Content dropdown, and Videos.

My content dropdown, videos

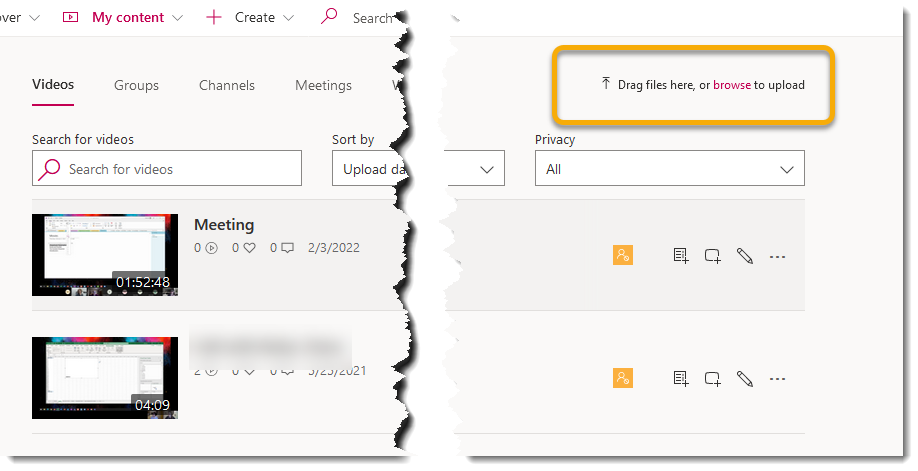
2. Look at the upper right of the screen for options to either click and Drag the videos into your stream, or Browse your machine.

My Content view, drag files here selected

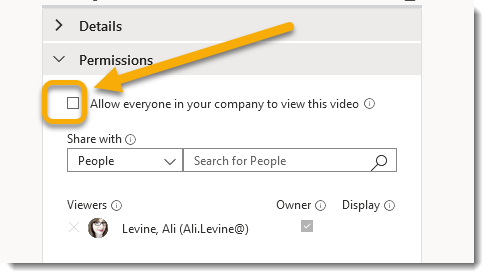
Important: the default for videos you upload is to make them Public to anyone at WSU. If you would like the video to be private, toggle the Permissions arrow, and deselect Allow everyone in your company to view this video.

Permissions: uncheck allow everyone in your company to view this video

3. Your video will take several minutes to process, and you will receive an email notification once this process is complete.

Downloading Caption File

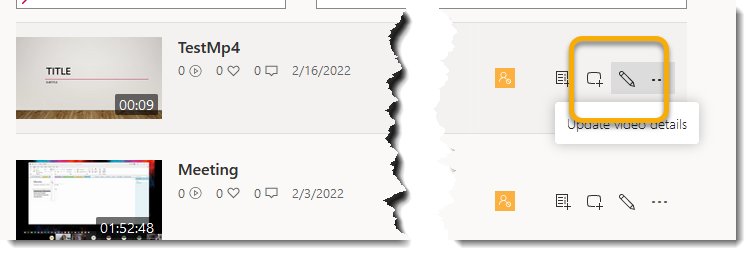
1. Once your video has finished uploading and processing, click on the Pencil next to the file name to access details of the video.

Edit video pencil

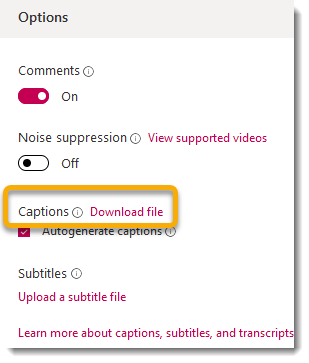
2. On the right side of the screen, under Options, and Captions, select Download File.

Download Captions

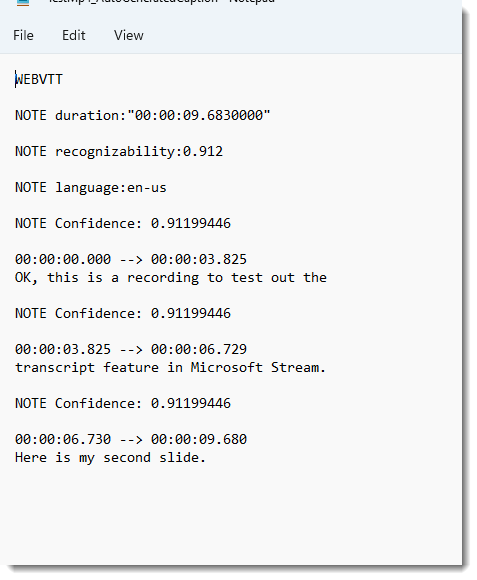
3. This will generate a VTT file for your video, and an excellent starting place for your caption file. You can double check these for accuracy and make alterations, as needed.

VTT file view

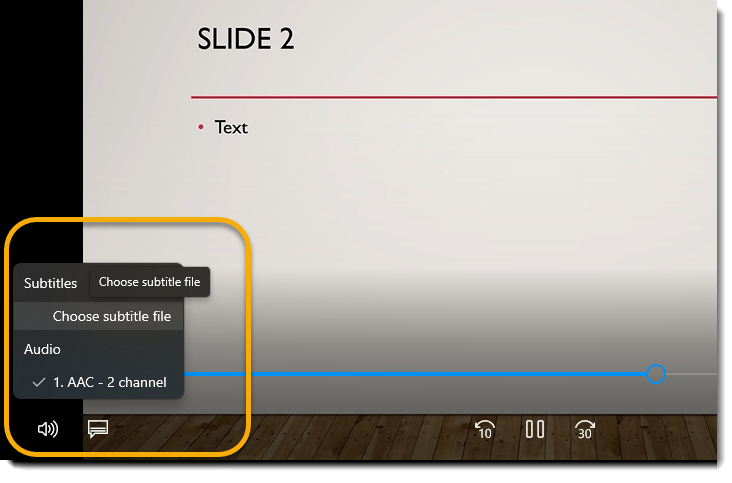
4. Now… how to apply the VTT file to your video will vary depending on your video application, but look for a symbol that looks like a word bubble or the letters “cc”. Below is where the feature lives in Window’s free video application.

Subtitles in Microsoft's free video application

Playing the Video in Stream with Captions

It is worth mentioning that you can also play your video within Stream with these captions applied.

  • Revisit My Content, Videos and select your video from the list to play it.
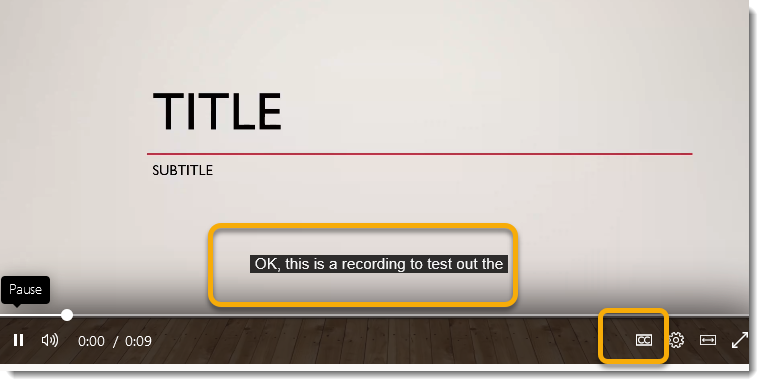
  • You may have to toggle on the “cc” button at the lower right for the captions to appear on the video.

Captions in Stream Video

Thoughts?

I would love to hear how you use this feature! Are the captions fairly accurate for you? Did this save you any time or money? Feel free to drop me a line.

Top 5 Microsoft Office Tools for Students 💻

As a Microsoft trainer who is also a returning adult student, I have been meaning to write about this topic for ages… Here are my top 5 favorite tools in Microsoft Office for students. These are in random order, because there was no earthly way to pick a favorite!

GIF demonstrating dictation tools

1. AutoSave Important Documents

Have you ever spent hours typing a paper without saving? Sometimes we get away with this sort of thing, and other times… Word, or your computer, might “encounter a problem,” leaving you stranded, with nothing to show but lost time and effort.

Consider using the AutoSave feature in Word by saving your paper to OneDrive.

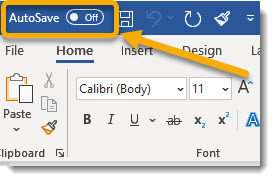
  • Open up an Office file (for example Word). You will notice an Autosave slider at the upper left of the screen.

Autosave slider

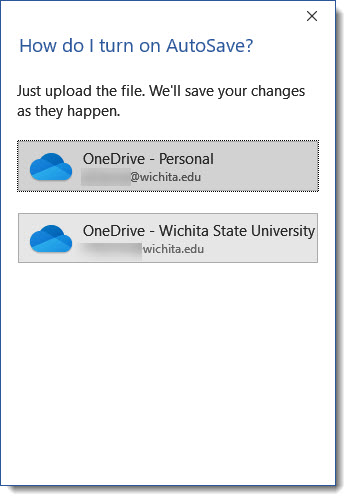
  • When you toggle that on, you will be prompted to save your file to OneDrive.

OneDrive prompt

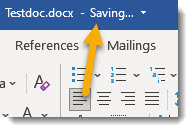
  • Once you do this, your document will constantly save automatically every time you make a change.

"Saving..." message

Also, by saving your document to OneDrive, you will be able to access your file from any computer or mobile device. Win Win!

2. Dictation Tools

Think about those classes where you have to do a lot of reading and are trying to simultaneously take notes while reading.

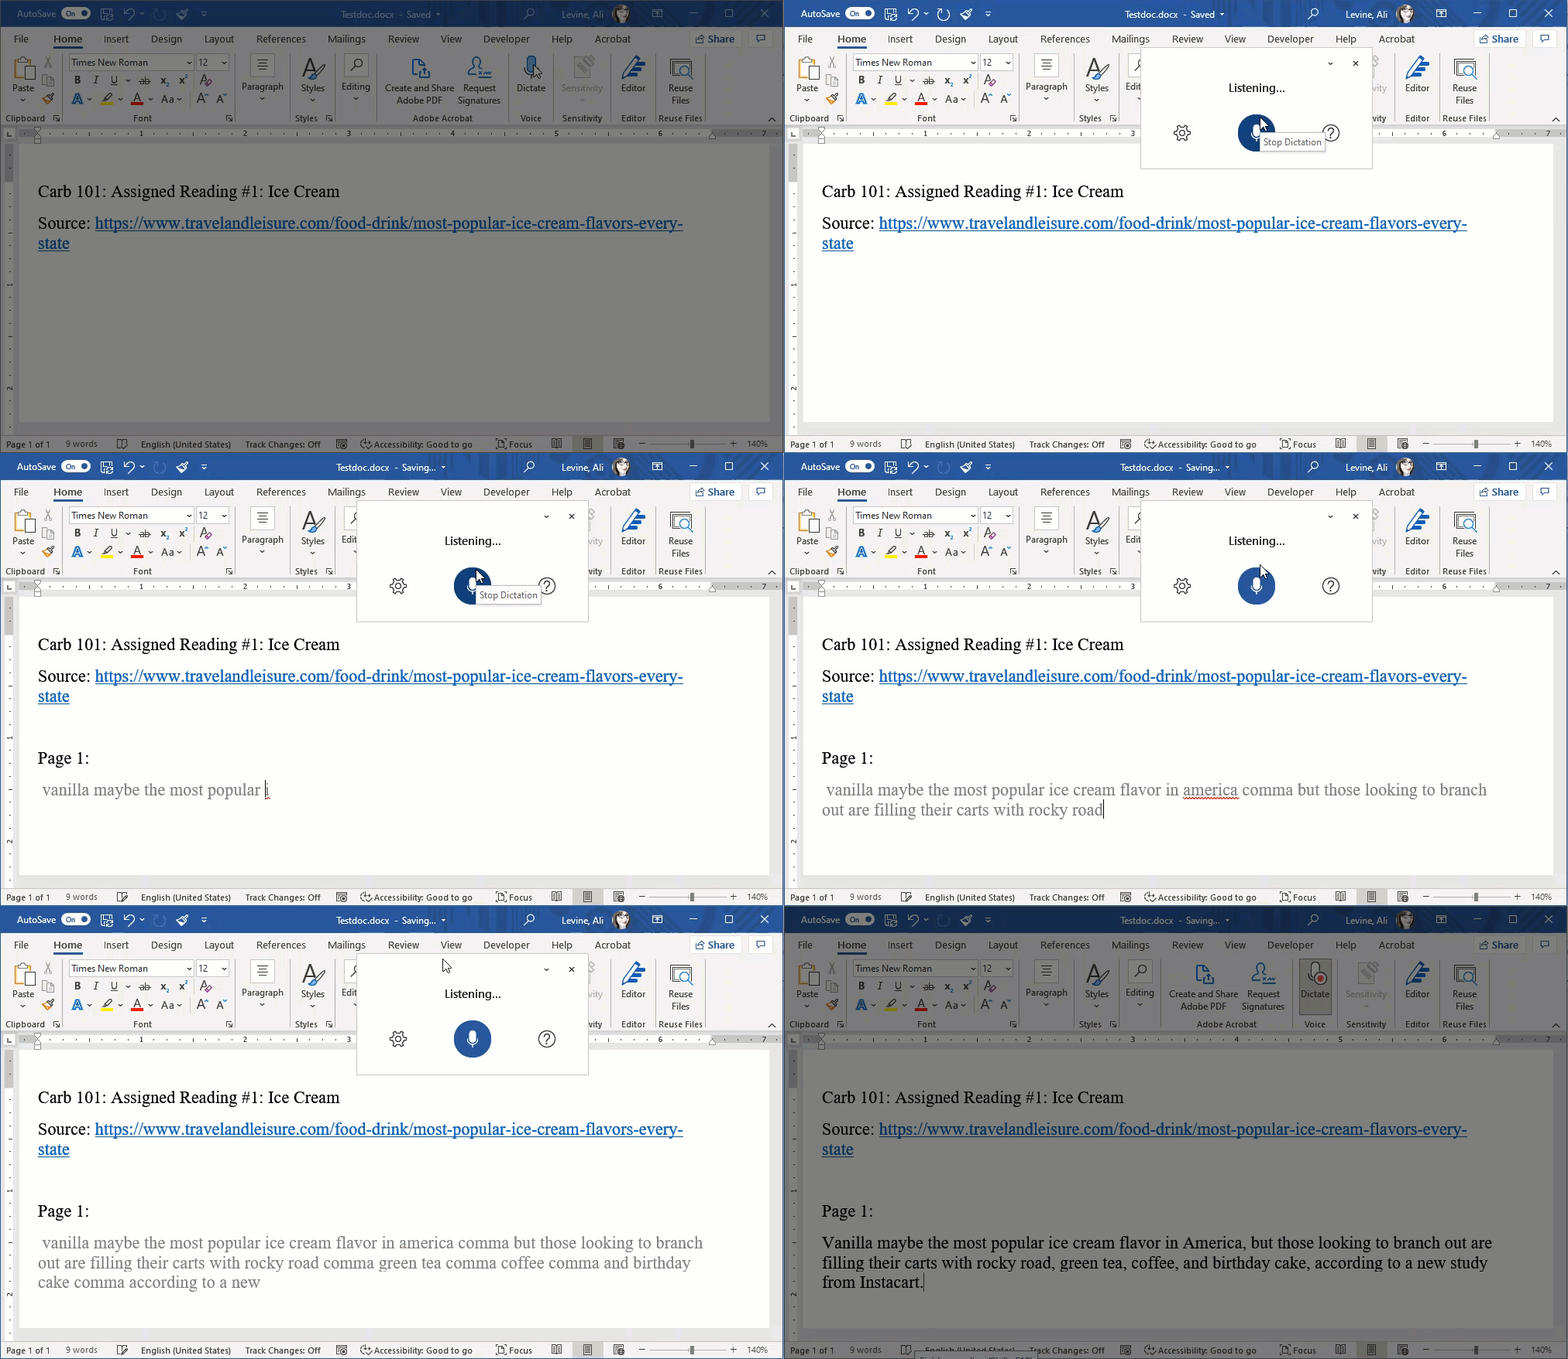
Take a look at how quickly I was able to take notes for my fictional CARB101 class, below:

GIF demonstrating dictation tools

Here is how you can try out this feature, and one caveat, you will need Office 365 for this one:

  • Open up a Word document (or some versions of OneNote).  On the right side of the Home tab, click on  Dictation.

Dictate button

  • As you are reading your textbook, read out loud the passages that you would like to include in your notes.

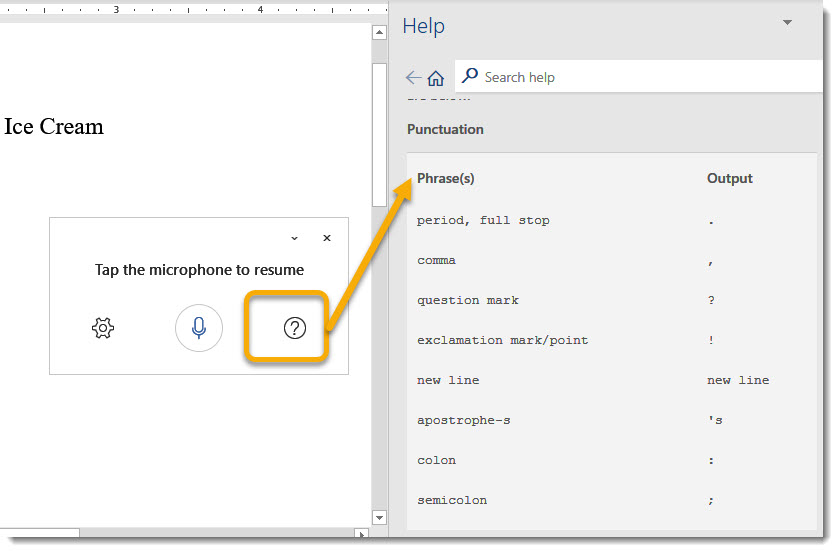
Pro Tip: there are commands within the dictation tools for punctuation, moving to the next line, and so on. If you want to see those, click on the question mark next to your Dictation tools:

Question mark menu with additional dictation commands

3. OneNote: Organize Class Notes and Documents

There are so many ways you can utilize OneNote as a student. In fact, I had so much to say about OneNote that this was difficult to summarize, but here goes:

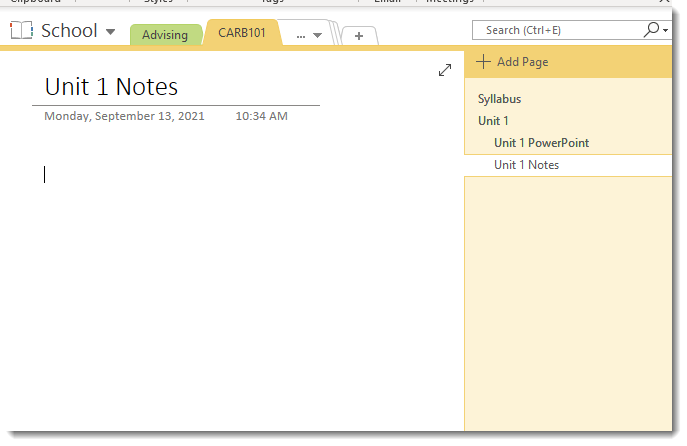
  • Note Taking: Most obviously, OneNote is an excellent way to organize your class notes:

Notebook for a class

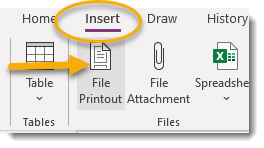
  • Files: You may also find OneNote to be a handy place to organize class handouts, syllabi, and so on. Try inserting content as a File Printout (Insert Tab):

File Printout button

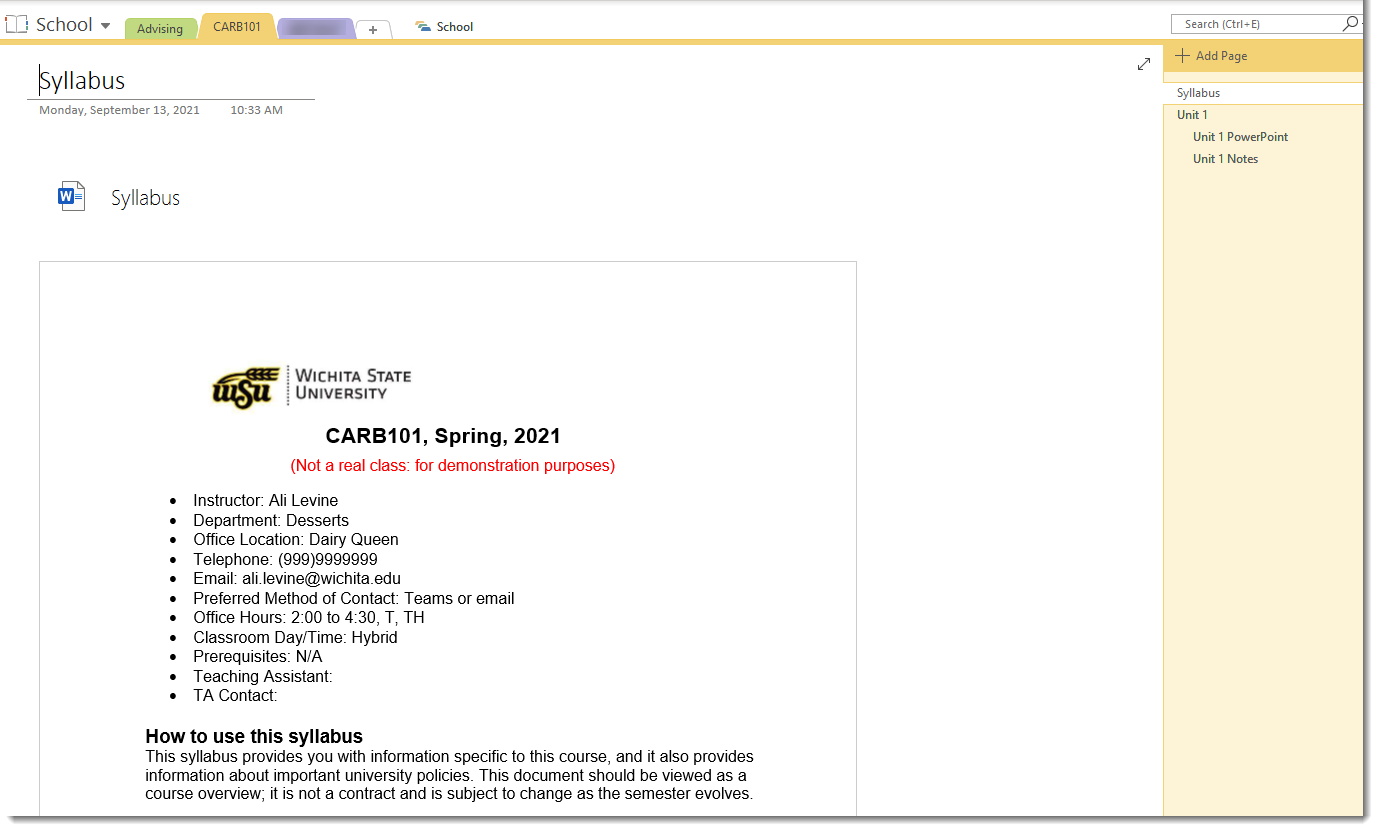
This will serve to attach a file to your notebook, with the addition of a handy readable printout within the note itself.  Here is my fictional syllabus, as an example:

Syllabus attached as a printout

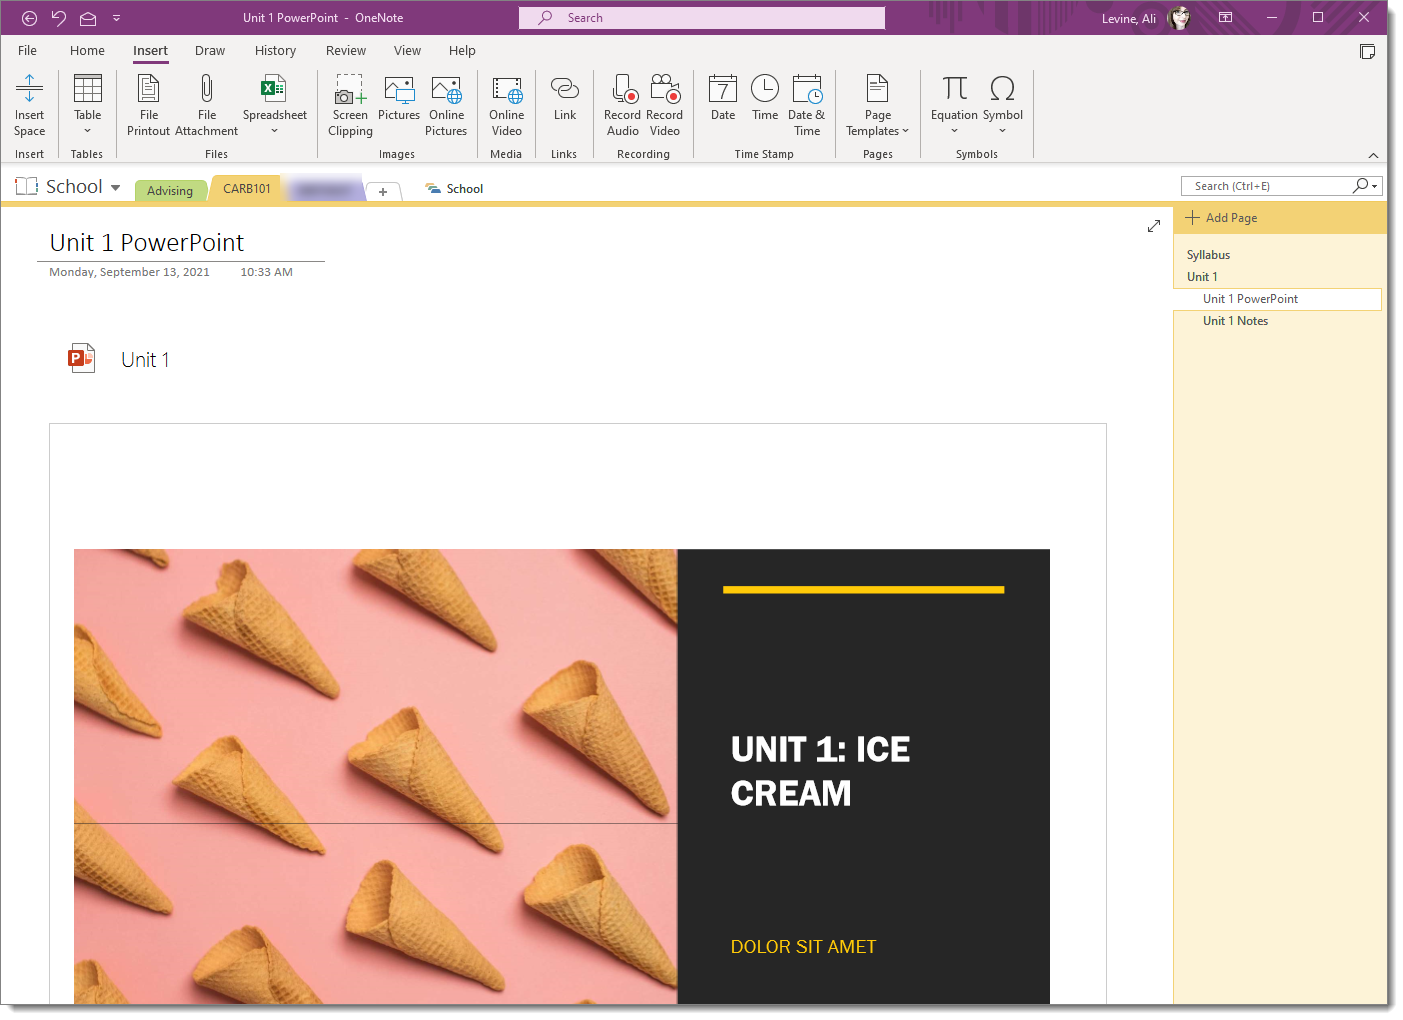
  • Printout File Options: This printout method will work with Word, Excel, PowerPoint and PDF files. Maybe your professor has shared a series of PowerPoints, for instance. Insert as a printout!

PowerPoint inserted as a printout

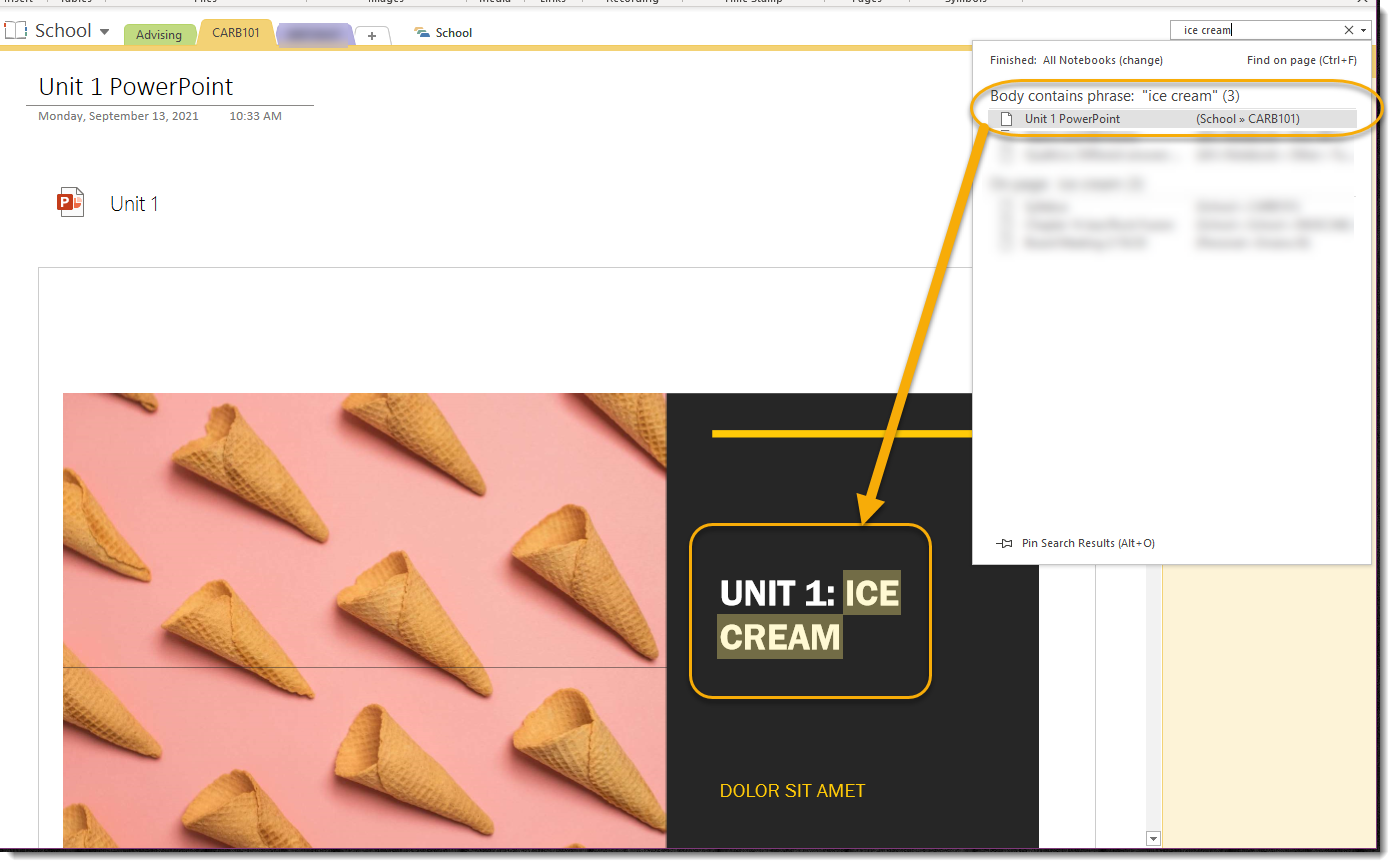
  • Search Features: OneNote has robust Search features, particularly the Windows desktop version of OneNote.
    • Bonus: when you insert documents as a printout, the content within the attachment is also searchable. Search tools are either found on the upper right of your OneNote screen, or on Mac and online versions, at the upper left via a spyglass.
    • OneNote also has OCR technology, meaning it can search the text within pictures.

Search feature searching within powerpoint printout

There is much more to say about OneNote, but this will get you launched!

4. Word: Citation Manager

You may have heard of EndNote and Zotero, but did you know that Word has a built-in citation manager? Word’s citation manager will allow you to save sources, cite sources in a  variety of formats, and also create an instant Works Cited/Bibliography in a variety of styles.

Bibliography dropdown


I have an entire entry on the Citation Manager in Word here: Word: Citations and Bibliography.

Fair warning: You do still have to double check yourself for typos!

5. Word: Style Sets

Will you be writing copious papers for one class, with specific formatting guidelines that will apply to all of these papers? For instance, “all papers must be in Times New Roman, 12 point font, double spaced.” You could set up each paper with these settings one by one, or you could utilize Word’s Style Sets so that you can apply all these special settings to future papers with a click of a button.

Step 1: Changing Existing Styles

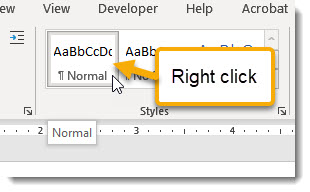
  • Open up a blank word document. Instead of changing text by hand, in the Home tab, Styles group, right click on the Normal style.

Right click on Normal style

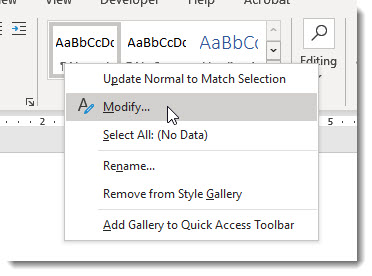
  • Select Modify.

Modify

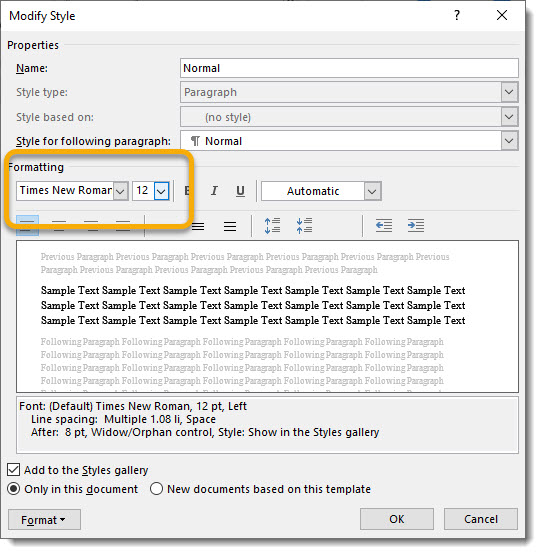
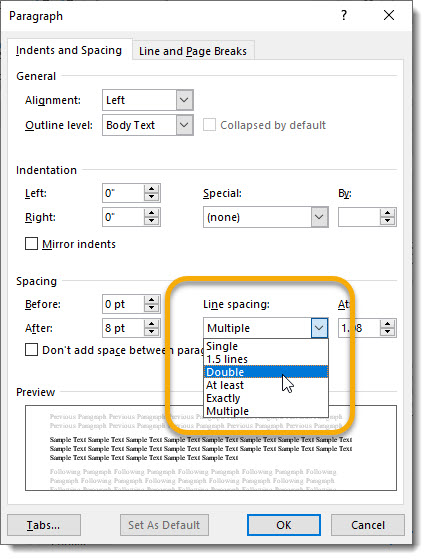
  • In the popup screen that appears, make the various font customizations: in this case, Times New Roman, 12 point font, double spaced.

Formatting options

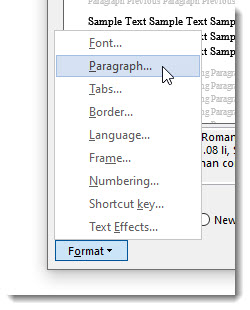
Note: you can do more advanced formatting in the Format dropdown in the lower left.

Paragraph options

… like hanging indents, spacing, etc.

Paragraph options

Step 2: Save the new style

  • Go to the Design tab, Document Formatting group, and click on the arrow at the lower right.

Design tab, dropdown

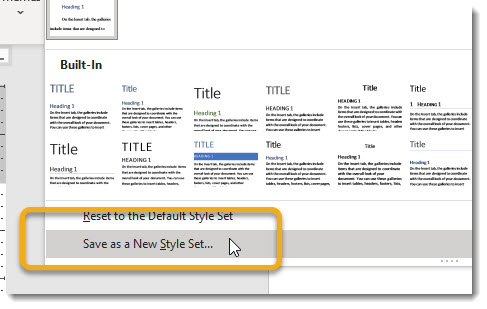
  • Select Save as a New Style Set.

Save as new style set

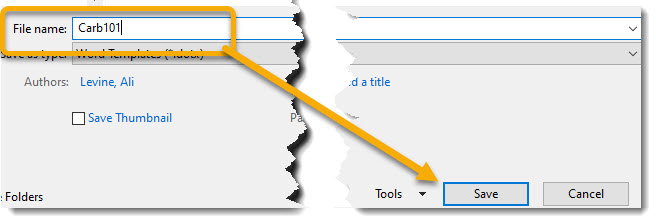
  • Choose a name (perhaps the class name), and click Save.

File name, save button

Step 3: Access the style

Going forward, you can apply these exact font settings to a new Word document:

  • Go to the Design tab, Document Formatting group, and click on the arrow at the lower right.
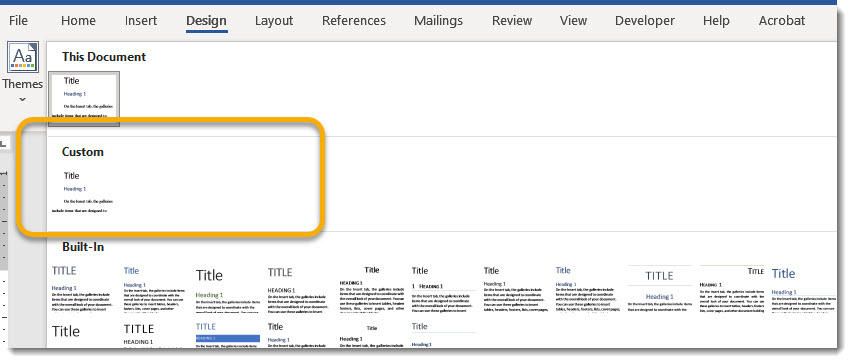
  • You now have a Custom section with your presets ready to apply to the new document.

Custom styles

In other words, with just a couple clicks, you can jump right in to typing your paper with the exact prescribed formatting.

Thoughts?

Do you think you will use these tips as a student? Or even as a non-student? I would love to hear what you think!

Congratulations, Power Users!

Congratulations to our newest Power Users! For the full gallery, and more information about the WSU Microsoft Office Power User Program, please visit: wichita.edu/poweruser

Deana Beek

Daniella Blair

Cheyenne Dealy

Cheyenn Power User

Janise Eck

Janise Power User

Shelly Ellis

Shelly Power User

Microsoft Accessibility Tools for Low Vision

Creating accessible documents is a vital practice; if you haven’t checked out my entry about the Microsoft Office Accessibility Checker, or Responsible use of Color in Documents please do! To continue on this subject, I thought we could talk about some Microsoft Windows and Office tools for people with low vision. If you are somebody with low vision, or know somebody with low vision, check out some of your options below. By the way, even if you do not have low vision, you might find some of these tools handy, for a variety of reasons.

Dictate button

Microsoft Zoom Tool

Microsoft’s Zoom tool is an excellent resource and comes with the default installation of Windows 10. This tool will instantly magnify your entire screen.

Zoom Tool

Within the Zoom tool, you can adjust the zoom level with the + or buttons, the settings of which will be saved the next time you access the feature.

To quickly access the Zoom tool, press the Windows key + plus sign (+).

Take a look at more key commands below for the Zoom tool.

Key Command Action
Windows key + plus sign (+) Zoom in (activate zoom tool)
Windows key + esc Turn off zoom
Ctrl + Alt + Space bar In zoom mode, show whole screen (context)
Windows key + U Ease of Access Center: Make default text bigger, apps bigger, change size of cursor and mouse pointer (more on this below)
Windows key + minus sign (-) Zoom out by one increment


When the zoom tool is activated,  select the gear to view more settings.

Zoom toolThe settings offer the ability to collapse the magnifier window and create me screen space. To change this setting, select Collapse Magnifier Window.

Collapse magnifier settings

Display Settings

There are several ways to access display settings. You can always press the windows key and search for display:

Windows key search for display setting

…or the keyboard shortcut is Windows Key + U.Display screen options from numbered list belowWithin this screen is the ability to:

  1. Make all text bigger
  2. Make the entire screen larger by default
  3. Change the size of Apps and text on other displays
  4. Change the size of the cursor and mouse pointer

Narrator

Windows 10 has a built in screen reader called Narrator. To access Narrator either:

  • Press the windows key and type Narrator,or
  • Use the command Windows Key + Ctrl + Enter

To access more settings for narrator:

  1. Press the Windows Key and go to Settings
  2. Select Ease of Access
  3. Select Narrator

Narrator in sidebar

High Contrast Settings

There are several ways to access high contrast settings in Windows. One way is to select the Windows Key and type “High Contrast”. Within the High Contrast options is the ability to turn on high contrast and adjust the settings.

High contrast settings

High Contrast mode can also be activated with the command:
Alt + left shift + Print Screen

Microsoft Office

You know this Byte wouldn’t be compete without some discussion about the Microsoft Office suite.

Quick Access Toolbar (QAT)

Don’t forget that in all of your Microsoft Office Programs is the ability to add your favorite tools to the Quick Access toolbar. This is the tiny toolbar that appears above the ribbon in Microsoft Office Programs.

Quick Access ToolbarYou can customize your QAT with any command in the program, eliminating the need to hunt for frequently used features.

To add something to the QAT, either right click on the item and select Add to Quick Access Toolbar…

Right click menu when right clicking on object in the ribbon: Add to quick access toolbar circled… Or press the dropdown arrow on the right of the QAT, and select More Commands to access a full list.

Dropdown menu, More commands selectedMore about the advantages of the QAT below…

Dictation

Heads up, you will need a working microphone on your computer for this one; some have this by default, but if not they are affordable to purchase.

In the Home tab of Word and PowerPoint, and in the Message tab of Outlook, there is a Dictate button, which will allow you to dictate the content of your document or email.

Dictate button

In addition to taking dictation of your words, you can also verbally input punctuation and spacing, like:

  • Comma
  • Semi colon
  • Period
  • Question Mark
  • New paragraph (for a new line)

In general, you can also access Dictation in Windows 10 with the command: Windows Key + H

Read Aloud

Just like you needed a microphone for Dictation above , make sure you have working speakers for Read Aloud.  This feature lives in the Review tab of Word…

Real aloud button

… and the Home and Message tabs in Outlook.

Excel is a little bit trickier, but there is an ability to have cells spoken to you. Remember your QAT (above)? This is where we will go to turn this feature on in Excel

Follow the instructions above to access More Commands in the QAT. Then this feature is found under All Commands. It is called Speak Cells.

Excel QAT screen

While you are in the QAT settings, you can also add Stop Speaking Cells to your QAT. Once this is in your QAT, you will see how easy it is to access when you read the next section.

The Power of Alt

When you are in any Microsoft Office program, press Alt on your keyboard. Notice that some labels appear in your ribbon.

Alt Menu

These labels contain letters and numbers that are shortcut keys to access the tabs and QAT in the ribbon.

In the example above (in Word), you can press Alt to access the commands, then P for the Layout tab. Now you have a new set of options. Maybe you choose to press M to access Margins.

In other words, you could learn a series of commands with these keys. In the future, maybe you would remember you could just press Alt, P, M to get to your margins.

Even if you are not someone with low vision, you might find that learning some of these shortcuts can really speed up productivity. These key commands almost always end up being a lot faster than hunting for icons.

Keyboard Commands

Most of us are familiar with a few keyboard commands. Ctrl C to copy, Ctrl V to paste, and so on. The fact is, there are tons of keyboard commands for Office applications, in addition to the handy Alt trick you learned above. And much like the Alt example, even if you are not someone with low vision, you might find that learning some of these shortcuts can speed up productivity.

Take a look at an example below, with a handful of commands that you can use in Outlook. Would you be interested in lists like this for all your Microsoft Office programs? If so, let me know!

Outlook Navigation

Key Command Action
Ctrl + 1 Mail
Ctrl + 2 Calendar
Ctrl + 3 Contacts
Ctrl + 4 Tasks
Ctrl + 6 Folder List
Ctrl + 8 Journal
Ctrl + E (or F3) Search
Ctrl + Y Go to a Different Folder
Alt Access the ribbon

Create Item

Key Command Action
Ctrl + shift + M Create New Email
Ctrl + shift + A  Create Appointment
Ctrl + shift + C Create Contact
Ctrl + shift + L Create contact group
Ctrl + shift + Q Create Meeting Request
Ctrl + shift + K Create Task
Ctrl + shift + E Create Folder
Ctrl + shift + J Create Journal Entry

Email

Key Command Action
Ctrl + R Reply
Ctrl + Shift + R Reply All
Ctrl + Shift + M New Message
Alt + S Send a message
Ctrl  + F Forward
Arrow Keys Next message, Previous Message
Ctrl + Period Next message (with msg open)
Ctrl + Comma Previous message (with msg open)
F9 Check for New Messages
Ctrl + shift + B Open Address Book
Insert Add Quick Flag to unopened message
Ctrl + U Mark as Unread
Ctrl + shift + I Switch to Inbox
Ctrl + shift + O Switch to Outbox

Format Text

Key Command Action
Ctrl + B Bold Text
Ctrl + Shift + L Add bullets
Ctrl + I Italic Text
Ctrl + U Underline Text
Ctrl + ] Increase Font Size
Ctrl + [ Decrease Font Size
Ctrl + X Cut
Ctrl + C Copy
Ctrl + V Paste
Ctrl + K Insert Hyperlink

All Items

Key Command Action
Ctrl + S Save
F12 Save As
Ctrl + Z Undo
Ctrl + D Delete
Ctrl + P Print
F7 Check Spelling
Ctrl + L Left Align
Ctrl + E Center Text
Ctrl + R Right Align
Alt + S Save and Close

Thoughts?

What do you think? What did I forget? If you are someone with low vision, are there features that you use in Microsoft Windows or Office that help you better use the applications? I would love to hear from you!

Congratulations, Power Users!

Congratulations to our newest Power Users! For the full gallery, and more information about the WSU Microsoft Office Power User Program, please visit: wichita.edu/poweruser

Amanda Duffy

Amanda Duffy
Microsoft Office 365 PowerUp! Sessions

New Session for WSU Faculty and Staff
Microsoft Office 365 at WSU will feature biannual updates, so you will start seeing new buttons and features appear in your ribbon periodically (perhaps you have noticed a few already). So, we are testing out something new…

Microsoft PowerUp!

  • The sessions will be called Microsoft PowerUp!
  • PowerUp is intended to showcase new features in 365, and will contain new information not covered in previous Microsoft Office sessions.
  • The sessions will be quick. These are demos, not full training sessions, so you can plan for about an hour.
  • Two January sessions will be offered: January 8th and 15th.  
  • Sessions are listed in myTraining, so sign up now and we will save you a spot and a free guide!


Exciting News: Digital Credential for WSU Power Users

Friends, I have an exciting announcement about the WSU Microsoft Office Power User Program.

Digital Credential for Power Users

Thanks to our industrious colleagues at Instructional Design and Access, there is now an official digital credential for WSU Microsoft Office Power Users!

What does this mean?If you become a WSU Microsoft Office Power User, one of these will be yours!


Power User Credential

(The flash in the corner of the image is in honor of Flash Fill! Isn’t it beautiful??)

Email Incoming…

Once you become a Power User, you will receive  an email from Credly that you have been awarded a credential. It will look something like this:

Email from Credly

To claim your credential:

  1. Select Get Started. You will be taken to a log in screen with your name and email already populated.
  2. Create a Password and check the appropriate boxes if you agree to terms.
    Create Password
  3. Click Sign Up Now.
    (p.s. if you already have an account with Credly, you can skip steps 2 through 4 and simply click the Login button underneath.

That is it! You will be taken to a log in screen showing your new credential. If you would like, you can share your new credential on social media with the share buttons on the left:


More options

Once you have created your Credly account, you can log in any time at Credly.com.  From here you can share or download your new credential any time.

  • From the main account screen, your credentials are visible. Account Screen
  • Hover over the Power User credential until options appear. The one on the right is sharing options.

Options

Click on the sharing options to see the ability to share your credential on:

  1. Facebook
  2. Twitter
  3. LinkedIn
  4. Download a digital version of the image (you can use it in your signature!)

Share Options

That is the latest and greatest from Power User Land! Congratulations to all the powerful Power Users (and future Power Users). See you in training…

Congratulations, Power Users!

Congratulations to our newest Power Users! For the full gallery, and more information about the WSU Microsoft Office Power User Program, please visit: wichita.edu/poweruser

Julie Brin

Julie Brin

Julie Clinesmith

Chris Darnell

Crystal Dilbeck

Taylor Moore

Jessica Torres

Freh Wuhib