If you have been working with videos and recordings recently, you may have been asked to generate captions, or procure a “vtt” file with captions for a video. There are services, like rev.com, that you can hire to create these caption files… but before you do that, you may want to check out this option that you already have in your Office 365 suite in an application called Microsoft Stream.
Note: For WSU Faculty and staff: you can also utilize Panopto to export captions. Contact the Office of Instructional Resources for more information.
Before we jump in, thank you to Rebeca for her question about this and for inspiring this Byte!
Warning: AI Ahead
This application uses Microsoft’s AI (Artificial Intelligence) to generate captions; it is the same software you use when you use captions in PowerPoint or Teams.
If you have ever used this feature in those applications, you may have noticed that the translations are not always perfect, and sometimes, unfortunately, Microsoft has trouble generating captions at all… long story short, be sure to double check the file that is generated from this process for accuracy.
Microsoft Stream
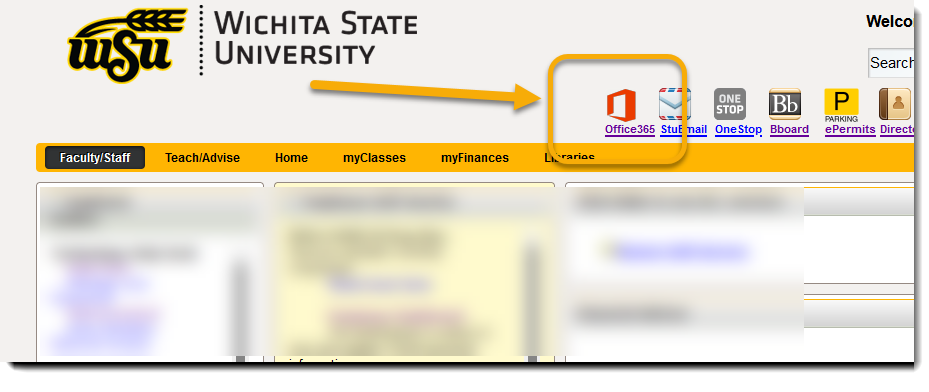
1. To access Microsoft Stream, first log into your Office 365 account. There is a shortcut in the upper right of your myWSU screen:
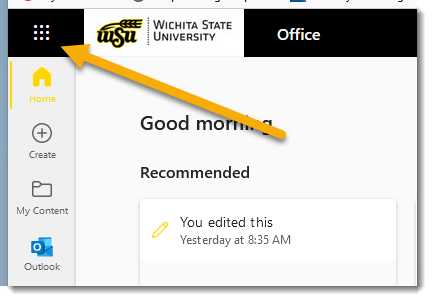
2. Once you have logged in, click on on the waffle at the upper left…
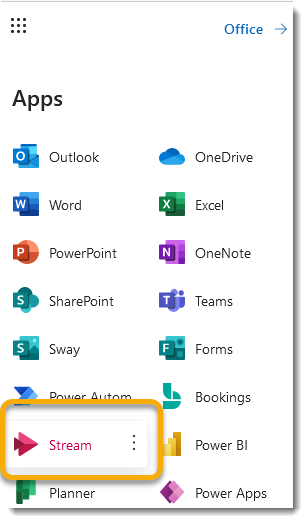
3. And find Stream in the app list. If you don’t see Stream here, click on More Apps at the bottom of the dropdown.
Upload a Video
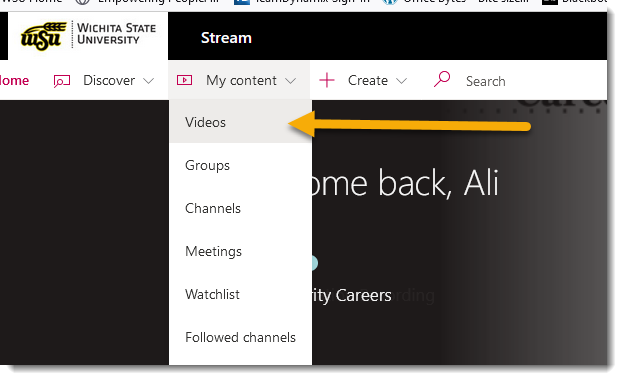
1. In Stream, in the ribbon at the top, select the My Content dropdown, and Videos.
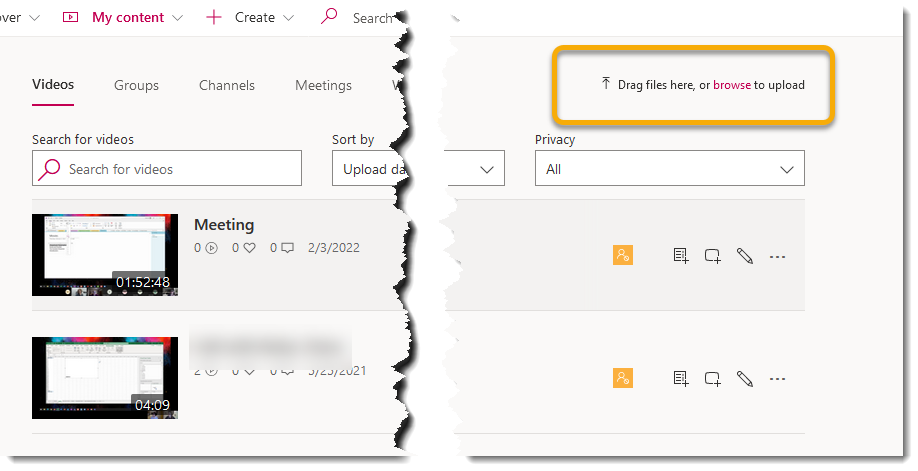
2. Look at the upper right of the screen for options to either click and Drag the videos into your stream, or Browse your machine.
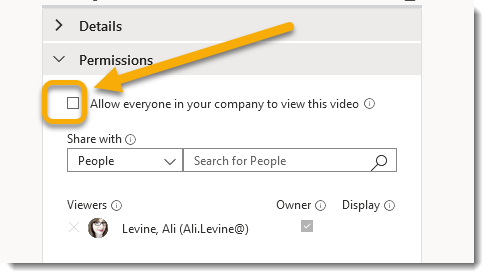
Important: the default for videos you upload is to make them Public to anyone at WSU. If you would like the video to be private, toggle the Permissions arrow, and deselect Allow everyone in your company to view this video.
3. Your video will take several minutes to process, and you will receive an email notification once this process is complete.
Downloading Caption File
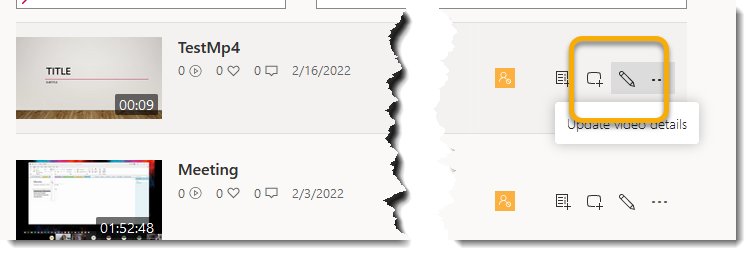
1. Once your video has finished uploading and processing, click on the Pencil next to the file name to access details of the video.
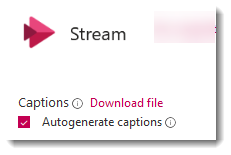
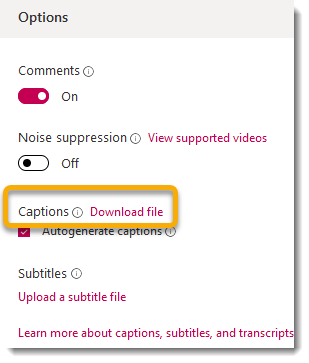
2. On the right side of the screen, under Options, and Captions, select Download File.
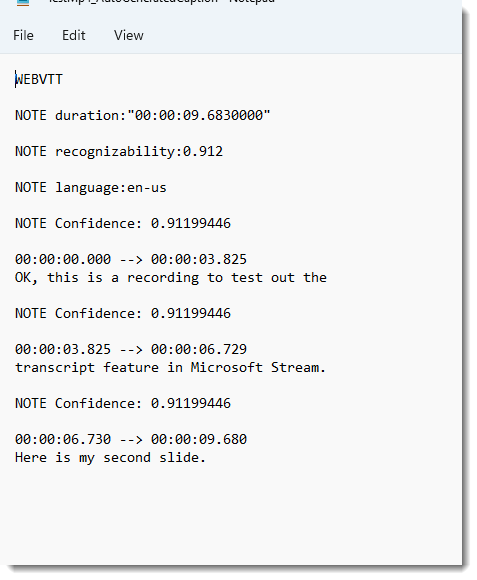
3. This will generate a VTT file for your video, and an excellent starting place for your caption file. You can double check these for accuracy and make alterations, as needed.
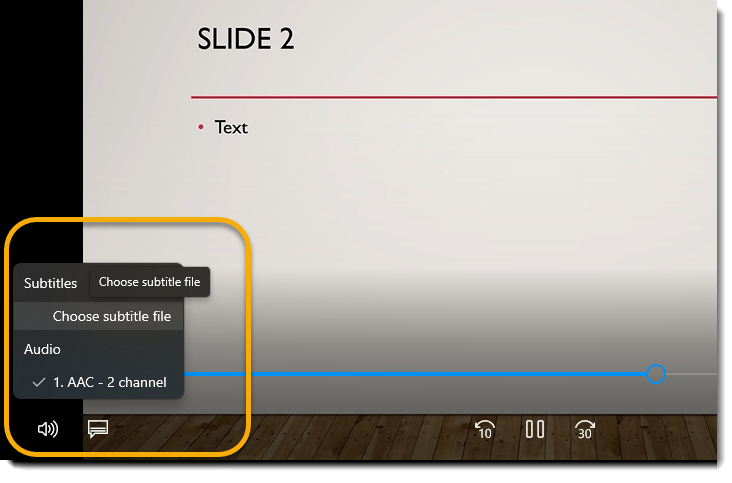
4. Now… how to apply the VTT file to your video will vary depending on your video application, but look for a symbol that looks like a word bubble or the letters “cc”. Below is where the feature lives in Window’s free video application.
Playing the Video in Stream with Captions
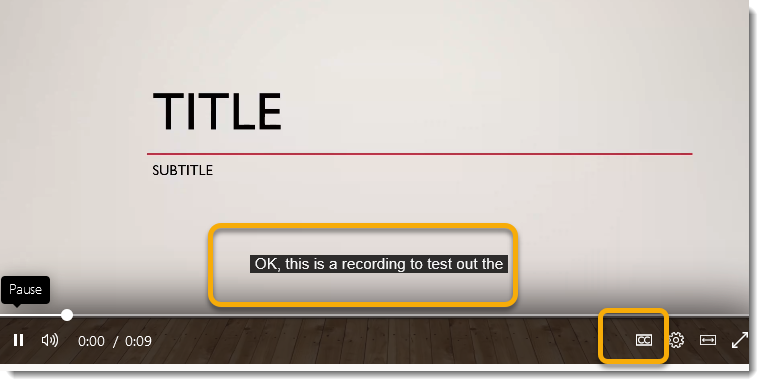
It is worth mentioning that you can also play your video within Stream with these captions applied.
- Revisit My Content, Videos and select your video from the list to play it.
- You may have to toggle on the “cc” button at the lower right for the captions to appear on the video.
Thoughts?
I would love to hear how you use this feature! Are the captions fairly accurate for you? Did this save you any time or money? Feel free to drop me a line.

