Have you ever recorded a meeting in Teams? Did you notice some mysterious language about something called Microsoft Stream? I’ve got you covered. Today we are going to demystify Microsoft Stream, and how it integrates with Microsoft Teams.
Before we get started… big thanks to both Gisuk and Anita who inspired this byte with their excellent questions about Microsoft Stream.
Video
Here is a video to walk you through the process. Additionally, I have written instructions below with screenshots. I would love to hear from you to know if you would like to see more videos, or if you prefer to read written instructions (or if you like both!)
Meeting Recordings
In Teams Essentials training, we talk about how it is possible to record a meeting.
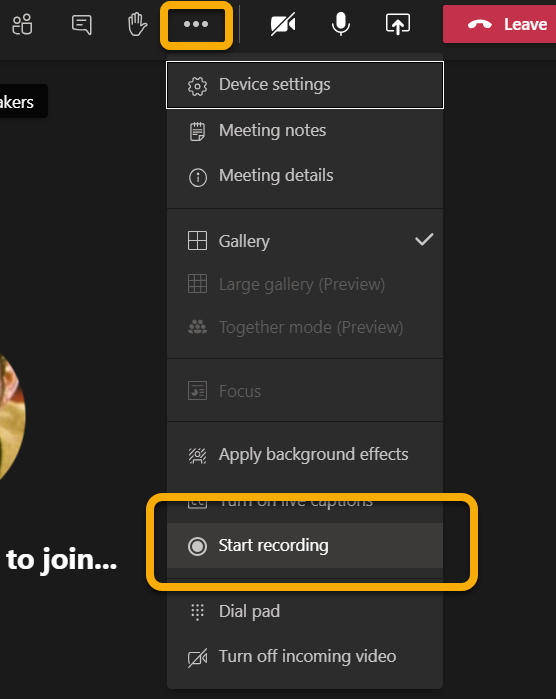
As a refresher, you can access this ability in a meeting by clicking on the ellipses (…) and selecting Start Recording.
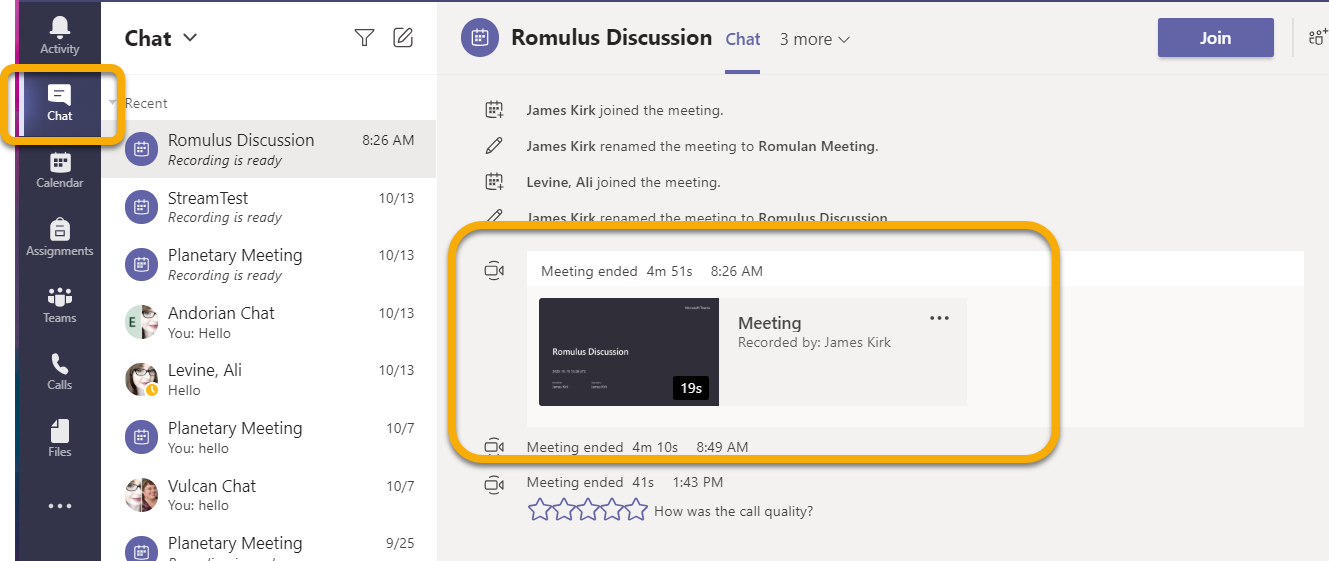
After your meeting is over, you, and everyone who attended your meeting, can access this recording in the meeting chat.
But a lot of you are curious about this… where is this recording saved? Why do you see reference to something called Microsoft Stream when you record videos? These are great questions.
Meeting recordings live in the Stream account of whomever recorded the meeting. By default, the people who were invited to the meeting are granted access to this recording.
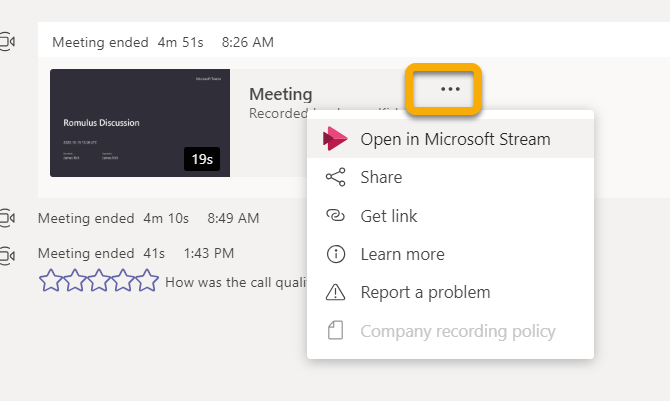
One quick way to access the recording in Stream, is to click on the ellipses (…) next to the recording, and select Open in Microsoft Stream.
You can also access Stream via O365 online. Let’s look at that method below, and then we can dive into Stream navigation.
Accessing Stream via O365
In addition to clicking on the Open in Microsoft Stream option above, you can also access Stream by visiting Office 365 Online.
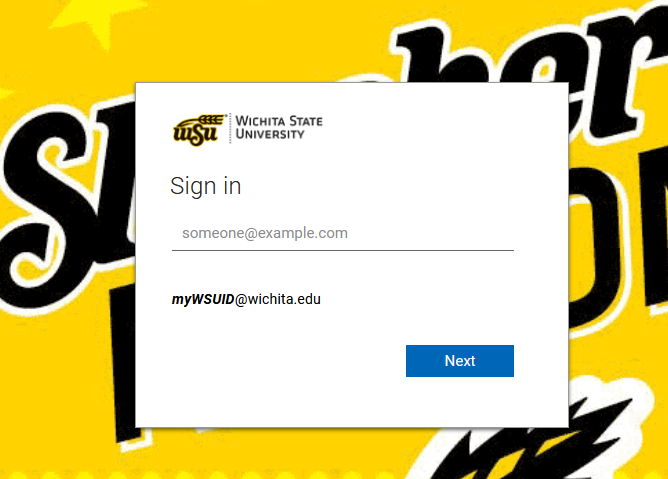
- In a new browser window, type into your address bar: o365.wichita.edu. You can also access Office 365 via the link at the upper right of myWSU.
- Sign in information is always your myWSUID@wichita.edu
- Password is your myWSUID password
- You may be asked to authenticate with Duo
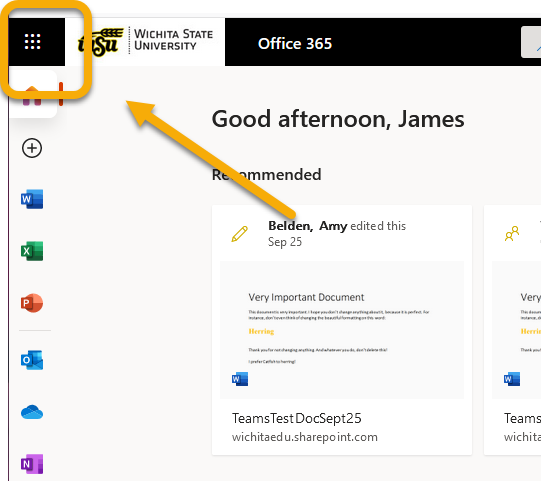
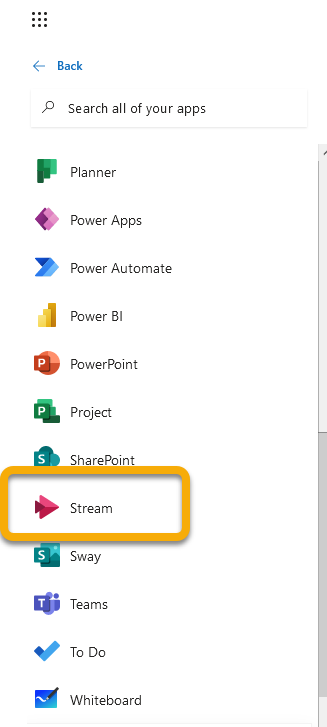
2. When you are logged in, click on the App Launcher at the upper left. Select All Apps to see a full list of options.
Video Options
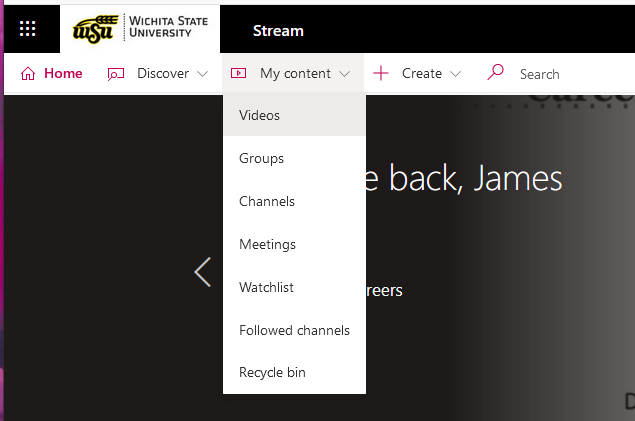
Once you have logged into Stream, in the upper left, you will see a ribbon of options.
- Click on the dropdown next to My Content. Select Videos.
2. Here are where all your saved meeting recordings live. 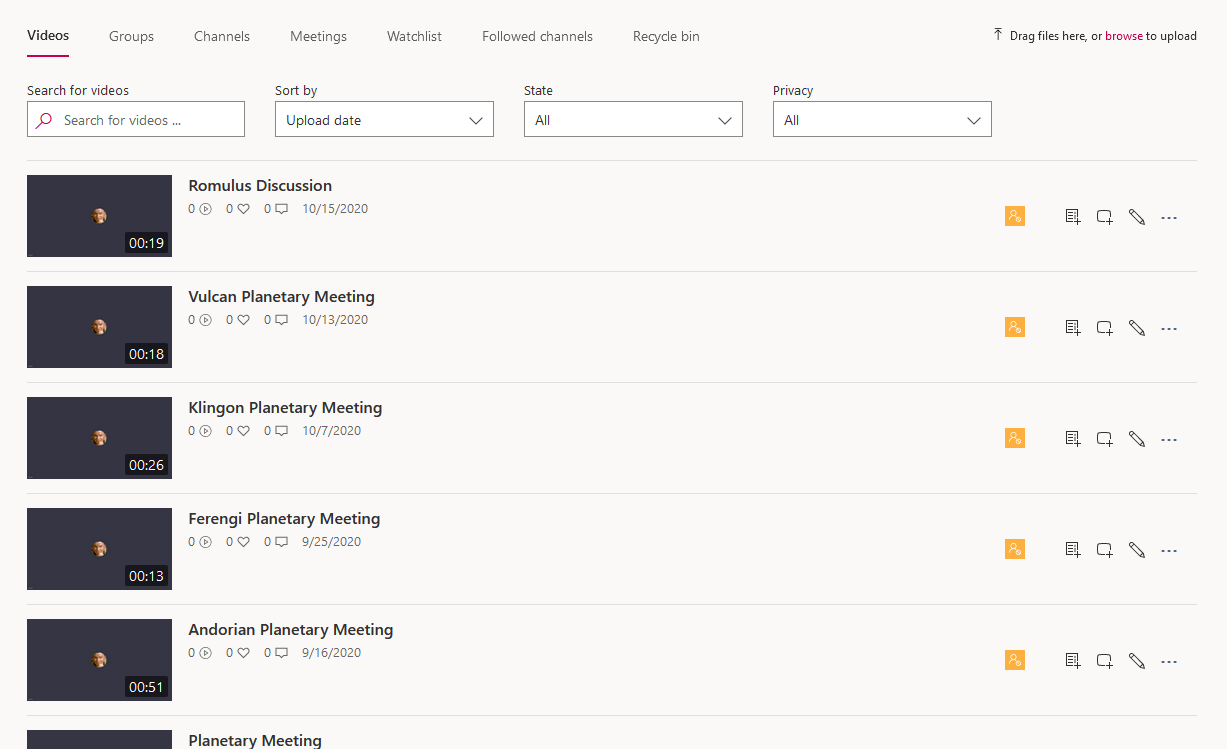
To the right of each video are a series of options.
Click on the ellipses (…) to:
- Share: generate a link; people will be prompted to log in to view
- Trim your video, or
- Download the video
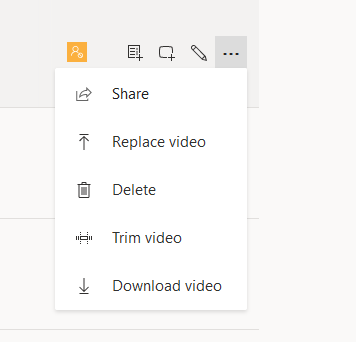
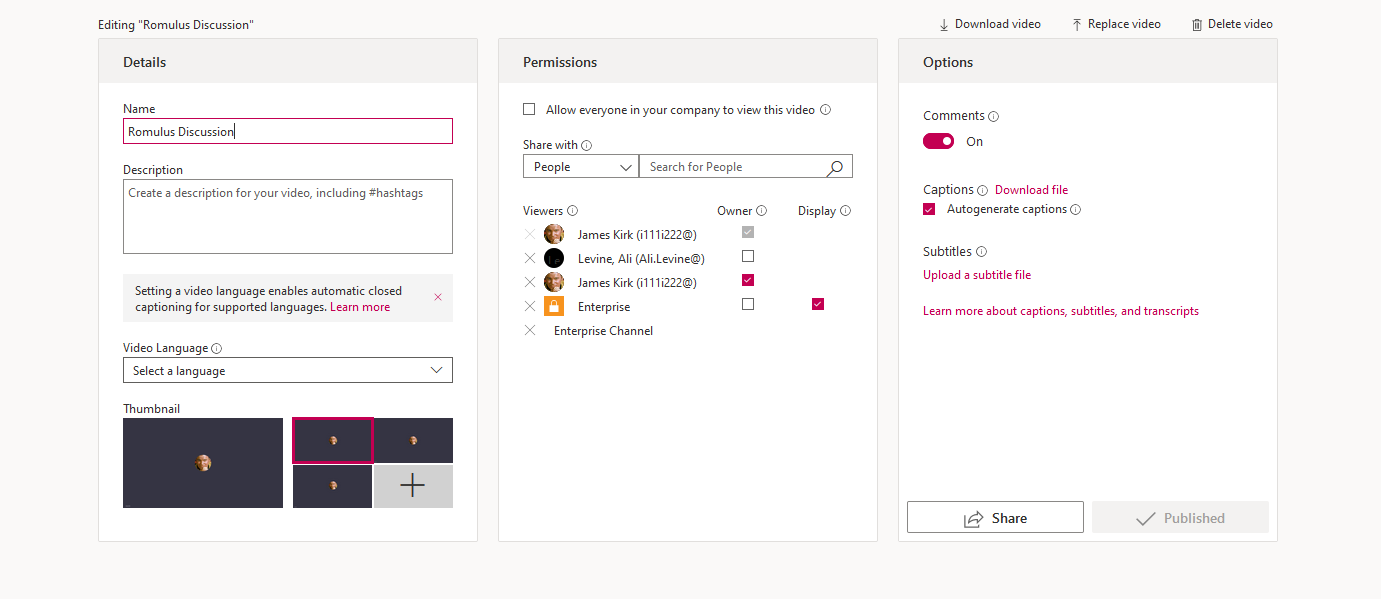
Click on the pencil to access video details.
In here, you can:
- Rename the video
- Grant additional permissions (note that whoever attended the meeting has access by default).
- Choose a thumbnail image
- Make the video public:
- Note: Meetings default to private, but you may have to double check this privacy setting when uploading your own videos to Stream
- And more…
Channel Options
In addition to sharing individual Stream videos, you may find that you need to share a group of videos with your Team. This is where creating a Channel will come in handy.
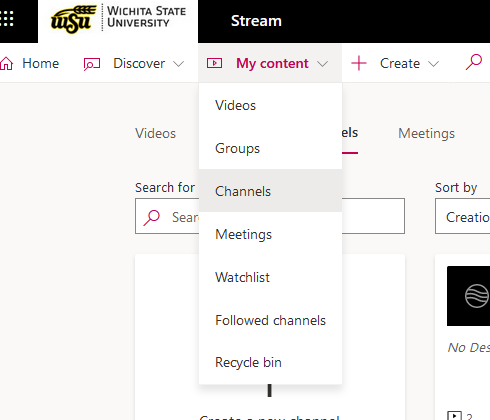
- While you are logged into Stream in O365, in the ribbon, Select My Content, and Channels.
2. Select Create a New Channel.
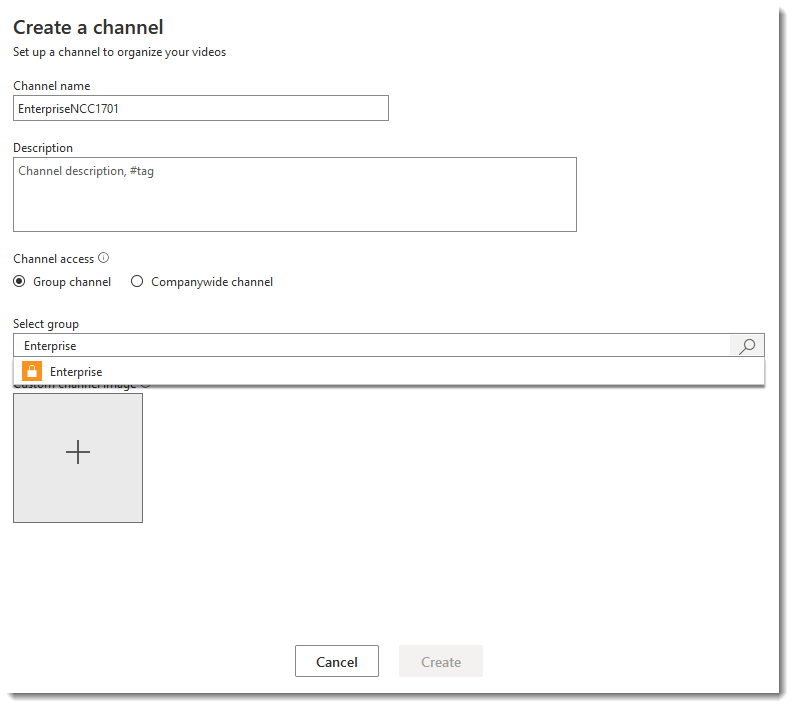
3. In the popup, give your channel a name and a description. Next to Select group, type in the name of your Team. Press the spyglass to find your Team. In this screen, Team and Group are the same thing.
Note: if your Team is brand new, it may take some time to appear in Stream as a group option.
Add videos to your channel
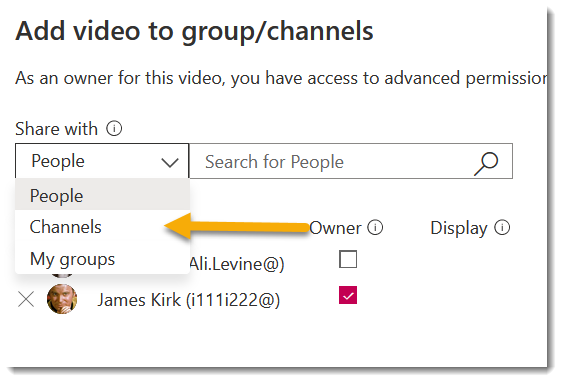
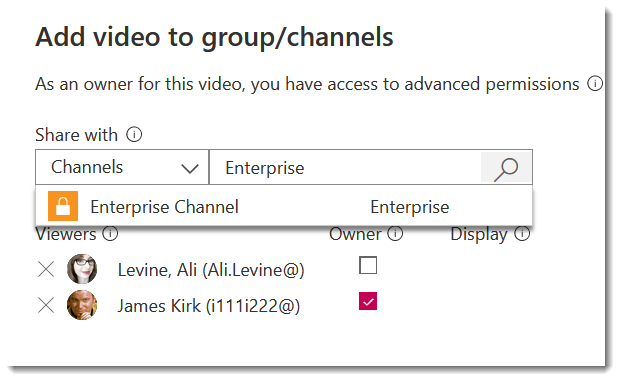
To add videos to your channel, look at the options to the right of your videos, click on the square with a + sign (see below).
- In the popup that appears, select Channels from the dropdown.
2. Search for your channel and select it from the list.
You can add any video from your Stream to your channel by following this process.
Channel Sharing Options
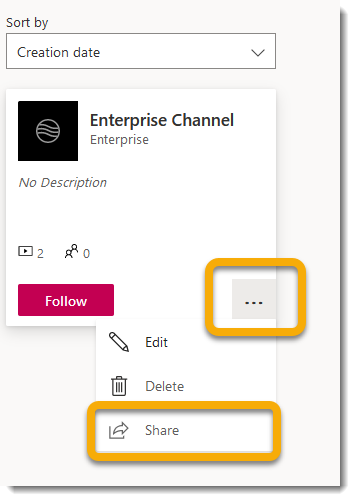
One more thing before we leave Stream and return to Teams. When you are in Channel view, notice the ellipses (…) next to the channel name. Click on this to see the Share option.
Just like when you generate a link for an individual video via share, you can also generate a link for an entire channel. Click copy to grab this link for use in the next step.
Creating a Stream Tab in Teams
Let’s return back to Teams for a bit. You have seen how you can generate a link with either a video or a channel. And you could share these links as… well… links. But this would require people to log in with their WSU accounts every time they want to access the videos. Here is a cool thing you can do in your Team itself.
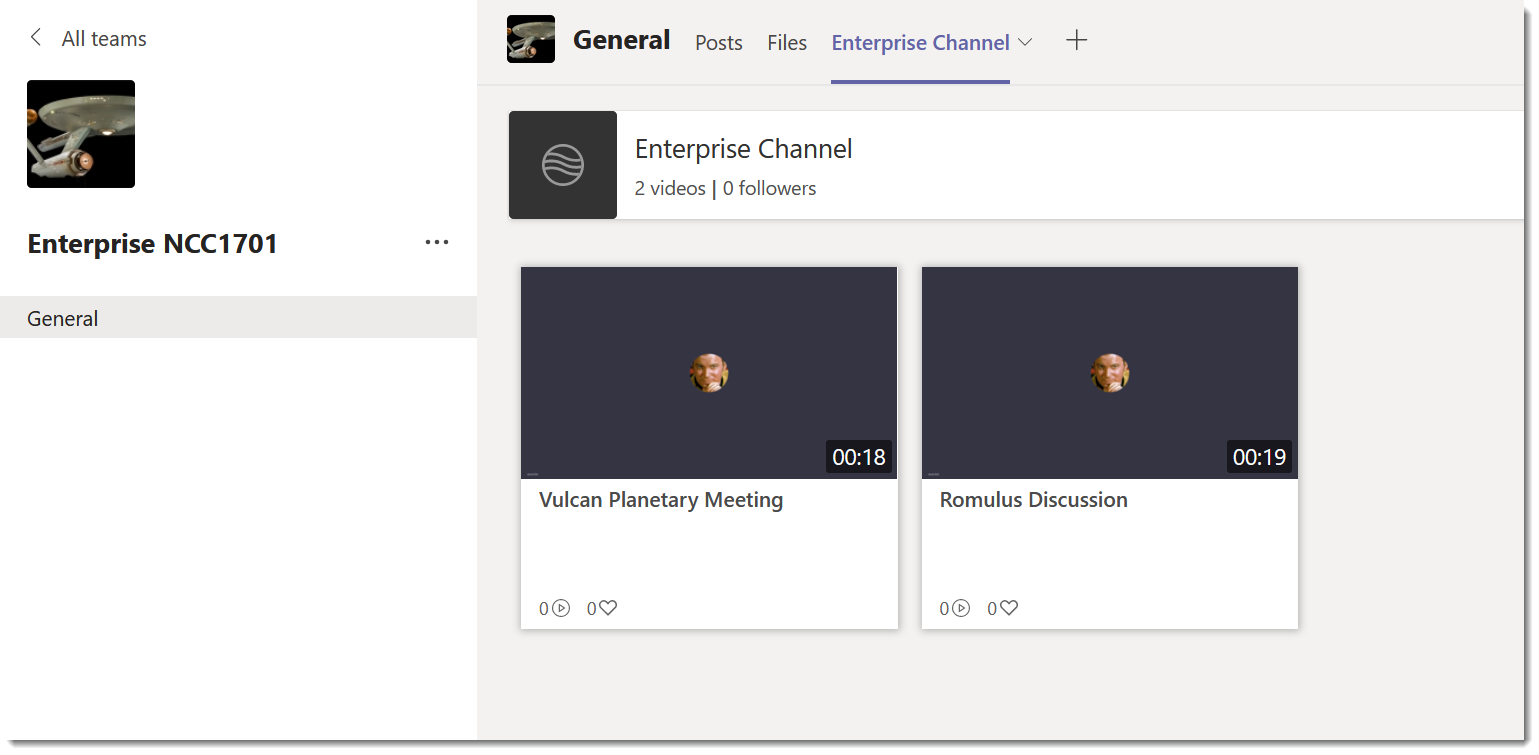
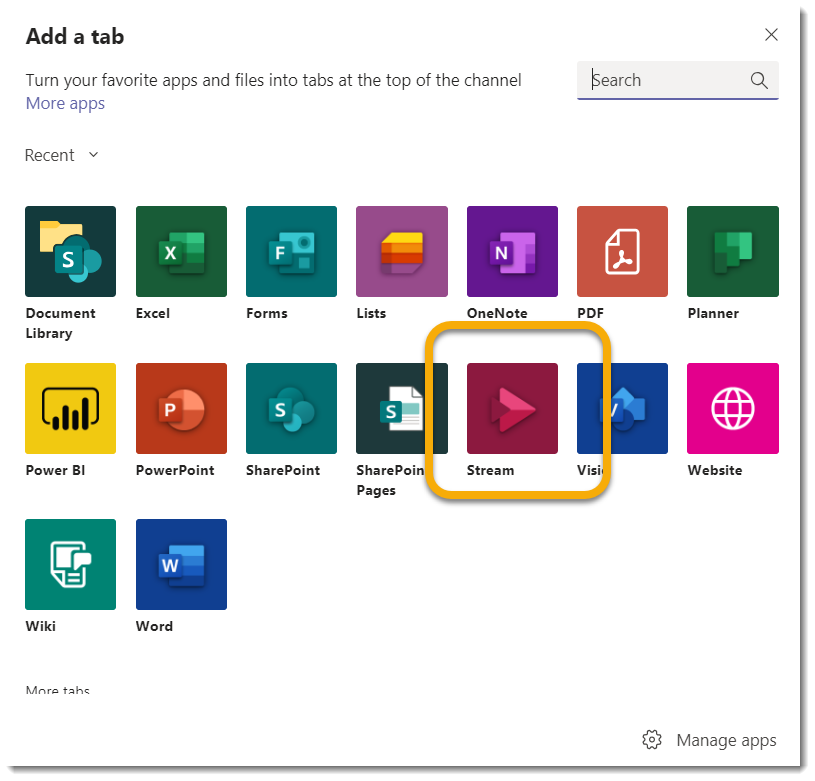
- Go to the Teams module and select your Team. Create a tab with the + sign at the upper right.
4. Paste in the link for your channel. Press Save. 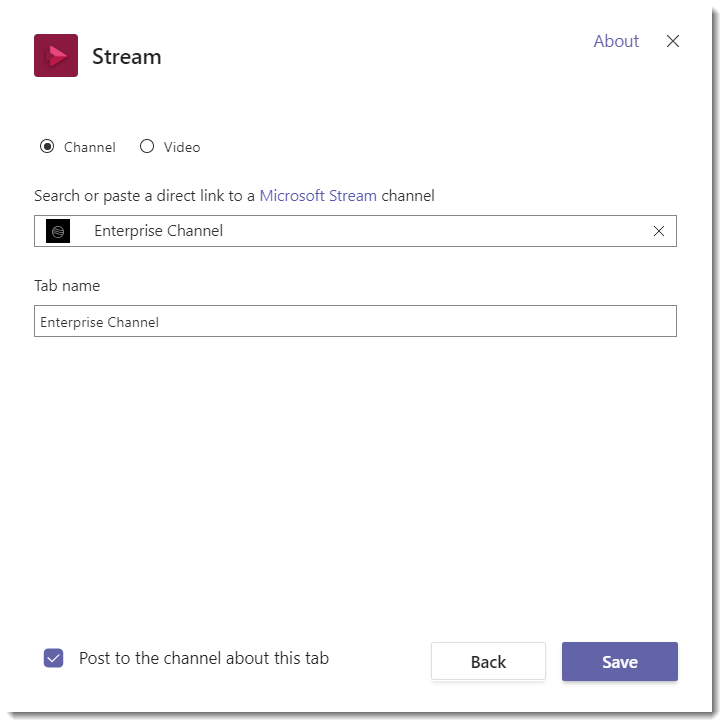
Now your Team can access any videos you put into this channel by simply accessing this tab in Teams. So cool!
As you add more videos to this channel, this will populate automatically.
Thoughts?
What do you think, will you set up a Stream tab in Teams for your Team? I would love to hear from you!
Congratulations, Power Users!
Congratulations to our newest Power Users! For the full gallery, and more information about the WSU Microsoft Office Power User Program, please visit: wichita.edu/poweruser
- Carolyn (Kay) Officer

